e-Waybill #
e-Waybill is an electronic waybill required to be generated on e-Waybill Portal for the movement of goods. India Compliance offers multiple ways to manage your e-Waybill compliance.
You can generate the e-Waybill using the bulk generation facility or the APIs.
Prerequisites #
- GSP credentials in ERPNext
- India Compliance Account
- API should be enabled under GST Settings.
- e-Waybill Configration
e-Waybill Generation Using API #
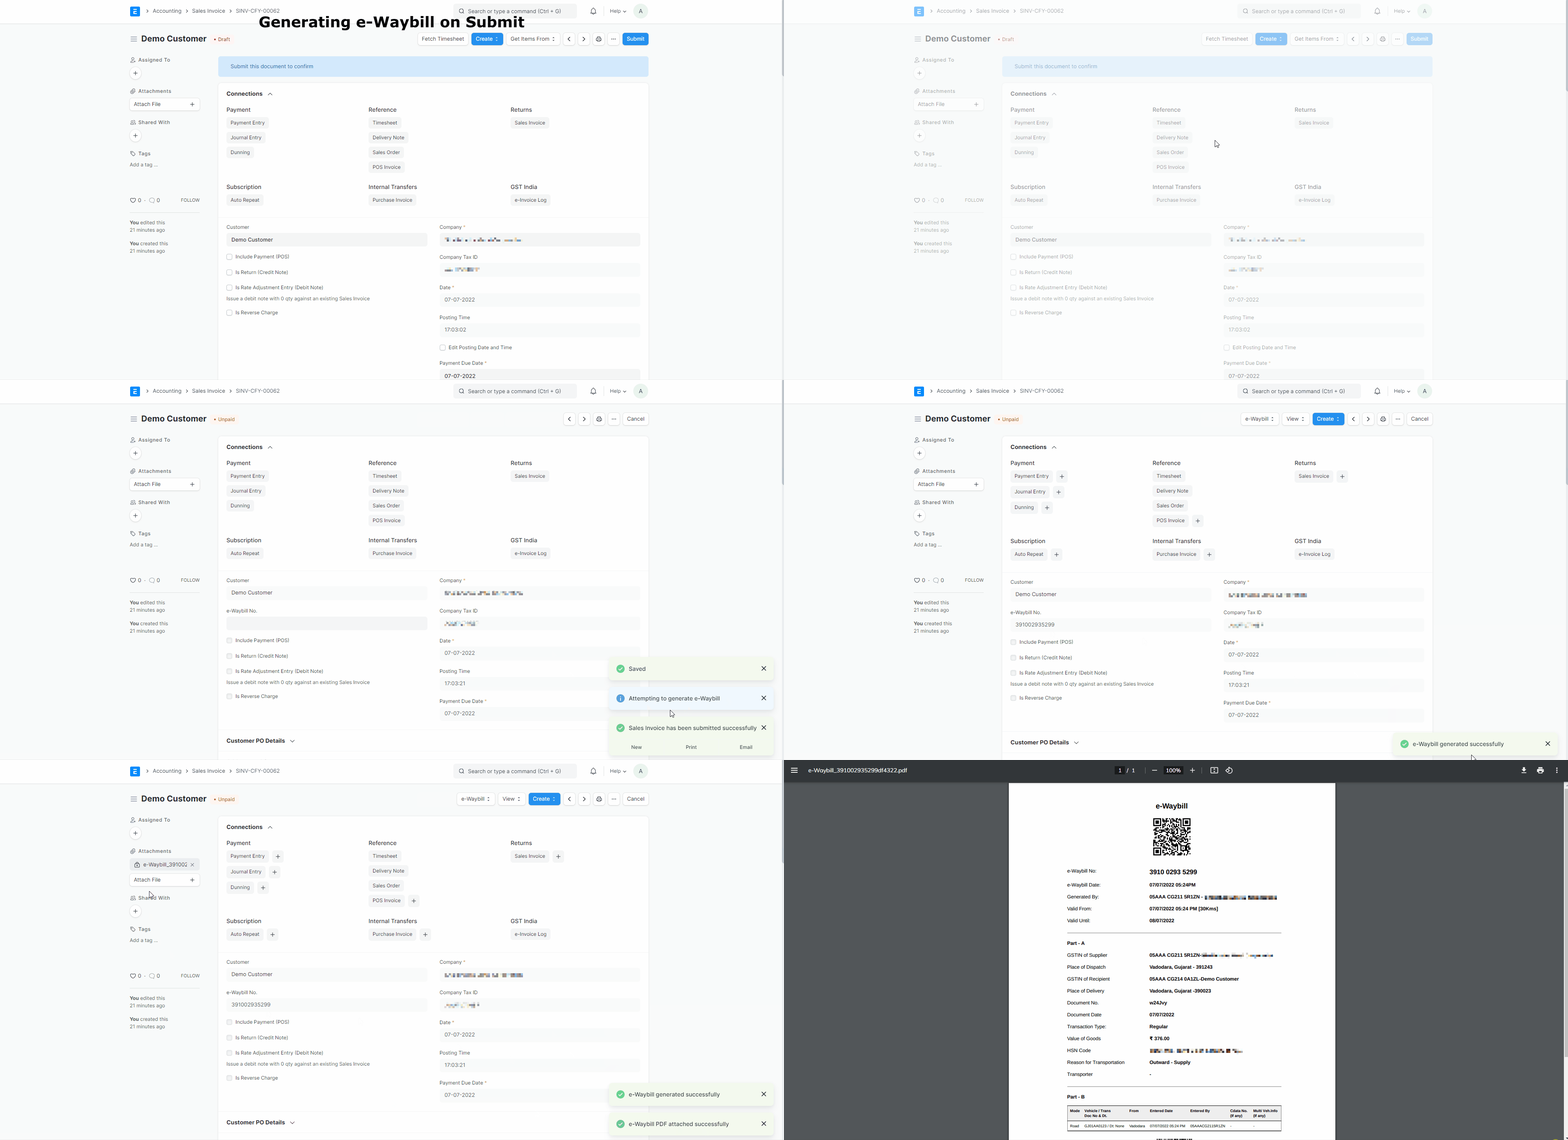
- On submitting the sales invoice, e-Waybill shall be automatically generated (if enabled in settings).
- You can manually trigger the generation of e-Waybill for Delivery Note or where all fields were not present (on submit).
Go to the e-Waybill menu --> Generate dialog --> Update fields and click Generate.
How would I know if only Part A of the e-Waybill will be generated? #
Dialog for Generate e-Waybill fields have separate sections for Part A and Part B. Also, the Primary Action button will denote if only Part A can be generated.
How to auto calculate the distance for e-Waybill? #
If the distance is set to zero (0), e-Waybill Portal will suggest the distance between postal codes. We shall update it to your document where e-Waybill is generated using the APIs.
In some exceptional circumstances, where the distance between postal codes is unavailable with the e-Waybill database, you shall receive a prompt. Generate e-Waybill again after entering the distance as per your estimate.
Update Transporter Details #
WARNING
Updating or cancelling e-Waybill is possible only within the validity period. These options will be visible only if you have generated the e-Waybill using API and the validity to do so is not expired.
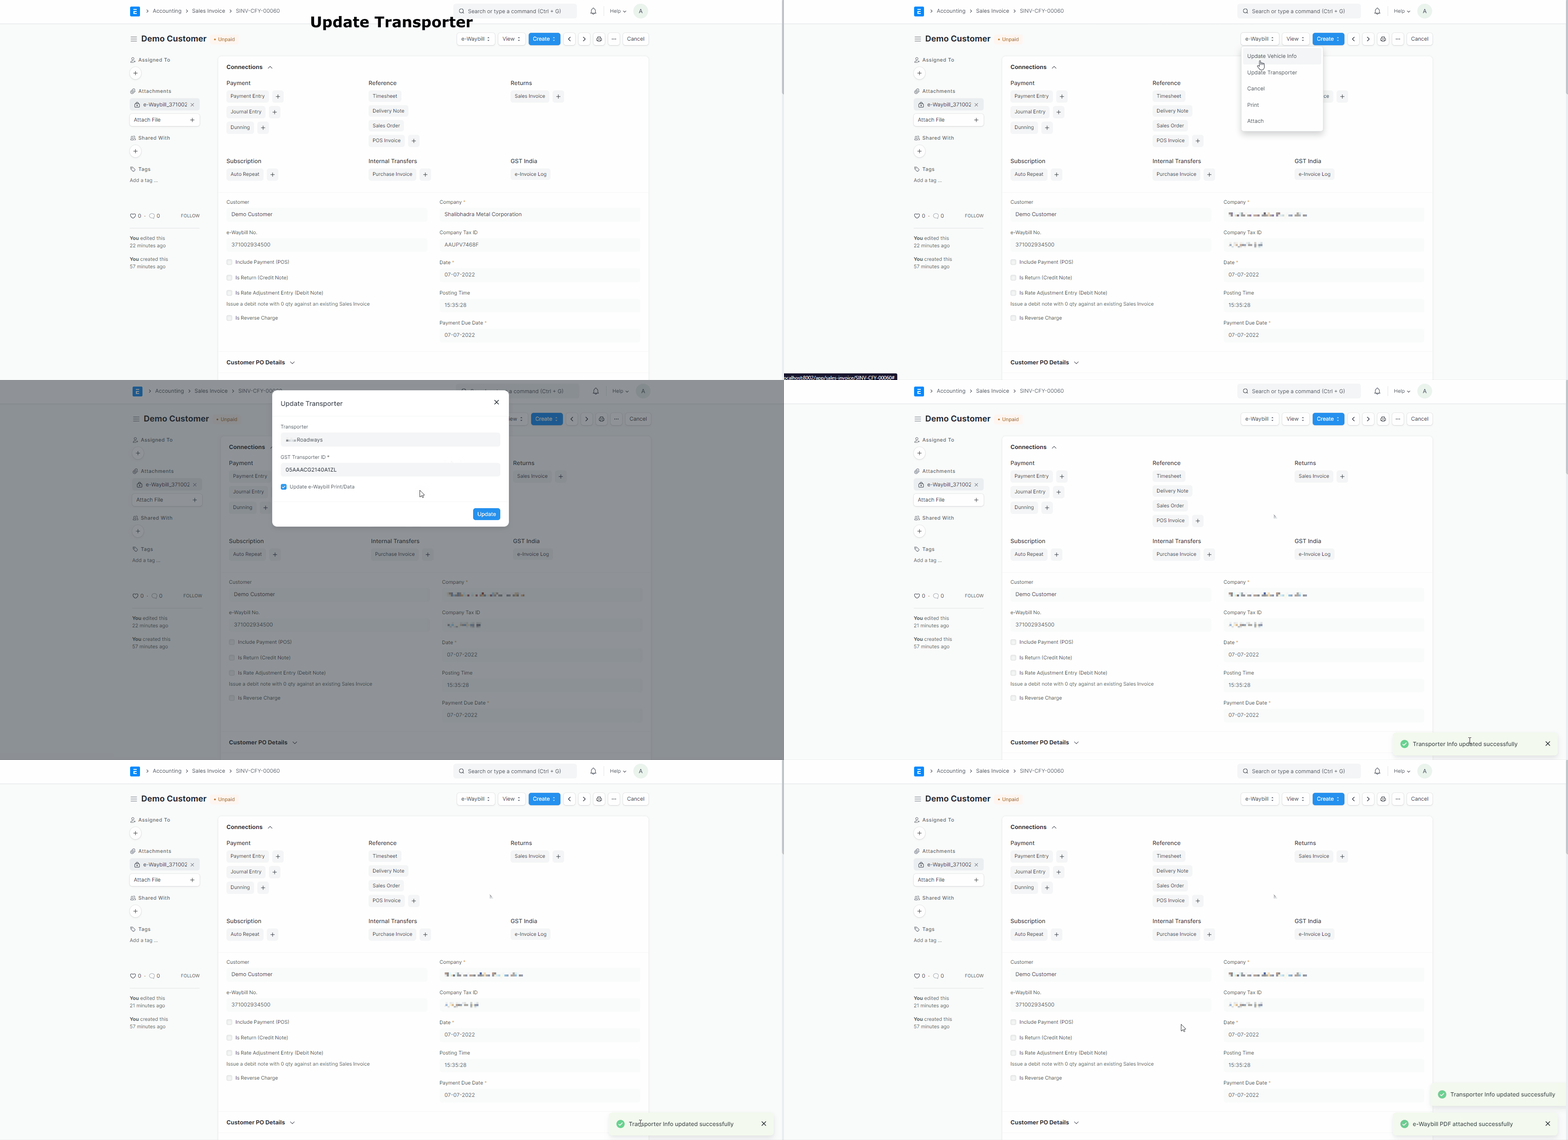
Use this feature to update the GSTIN of the transporter to your e-Waybill.
From e-Waybill menu --> Select Update Transporter --> Update appropriate information and click update.
Update Vehicle Information #
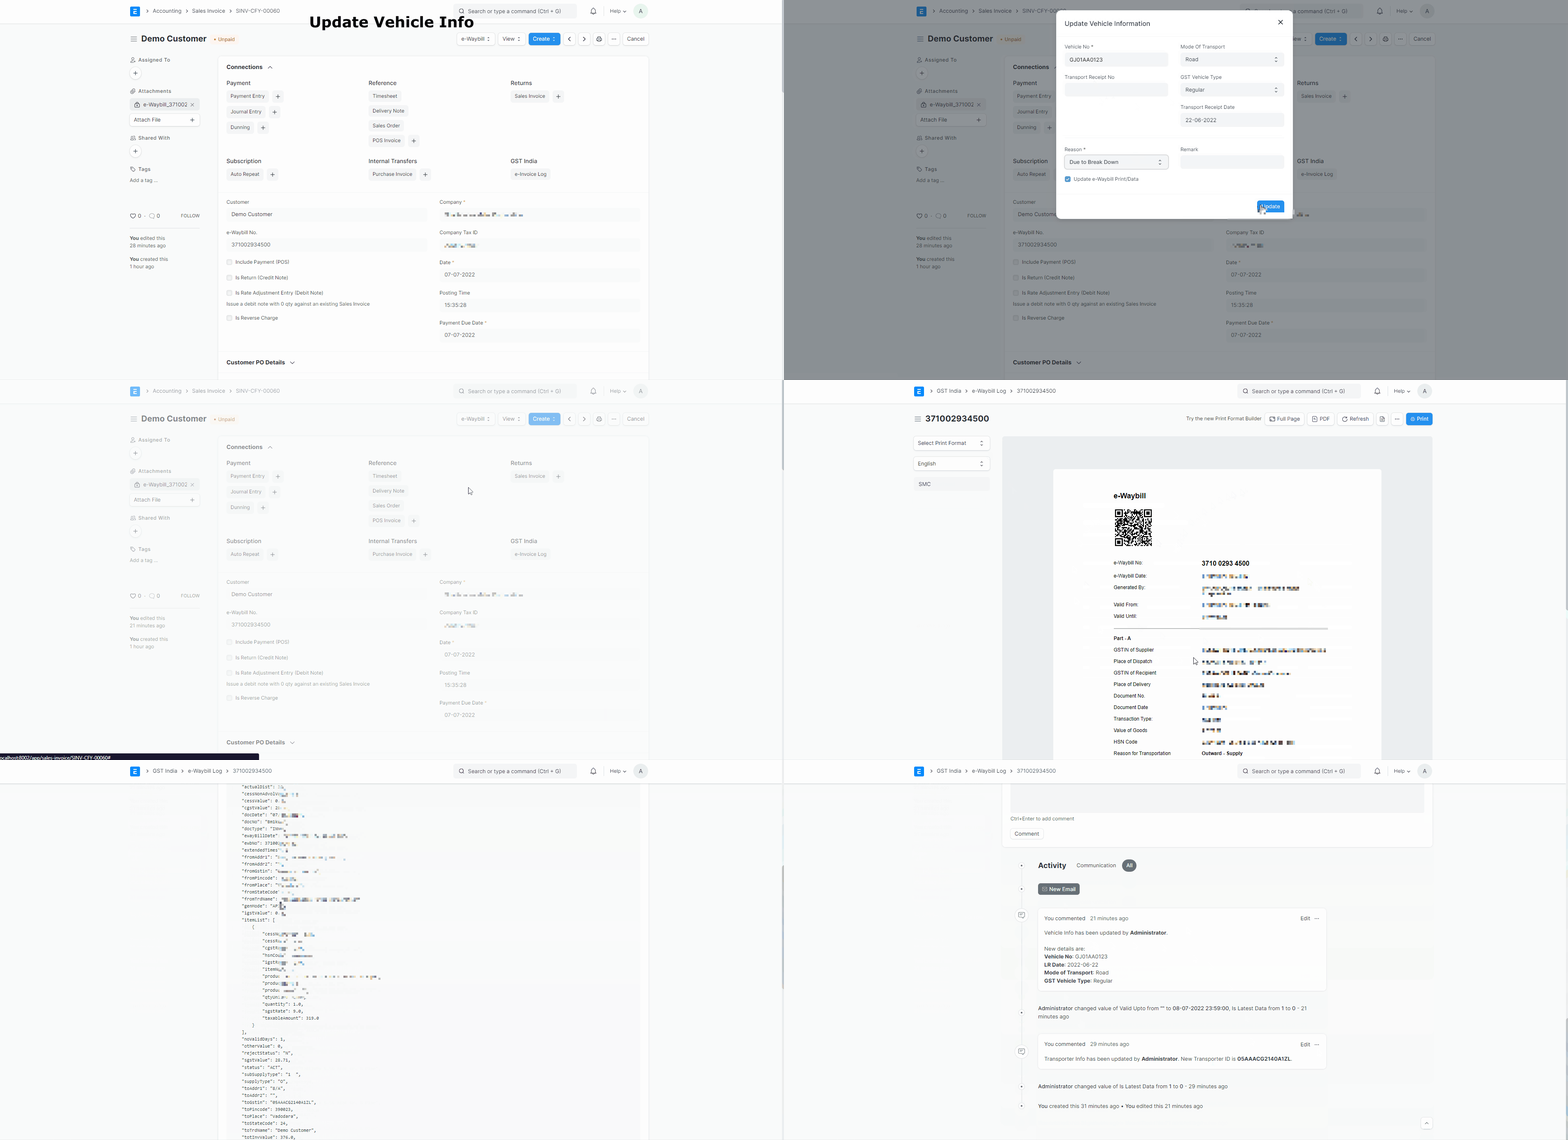
Use this feature to update the vehicle information (say, vehicle number) to your e-Waybill. From e-Waybill menu --> Select Update Vehicle Info --> Update information in dialog and click update.
There is a checkbox in the dialogs above for
Update e-Waybill Print/Data. If you check this, we shall update the attachments of e-Waybill or Data concerning e-Waybill as per your preference from GST settings for e-Waybill. IfAttach e-Waybill Print After Generationis enabled from GST Settings, new attachments will replace old attachments.
Print e-Waybill #
You can use this to print an e-Waybill if you prefer not to have attachments. It works similar to printing any other document in ERPNext. It will redirect you to the respective e-Waybill log print and fetch the latest e-Waybill data (from NIC Portal) for printing if it's not available.
Attach e-Waybill #
It is a manual trigger to attach an e-Waybill to a Sales Invoice. A new attachment will replace the old attachment if present.
Cancel e-Waybill #
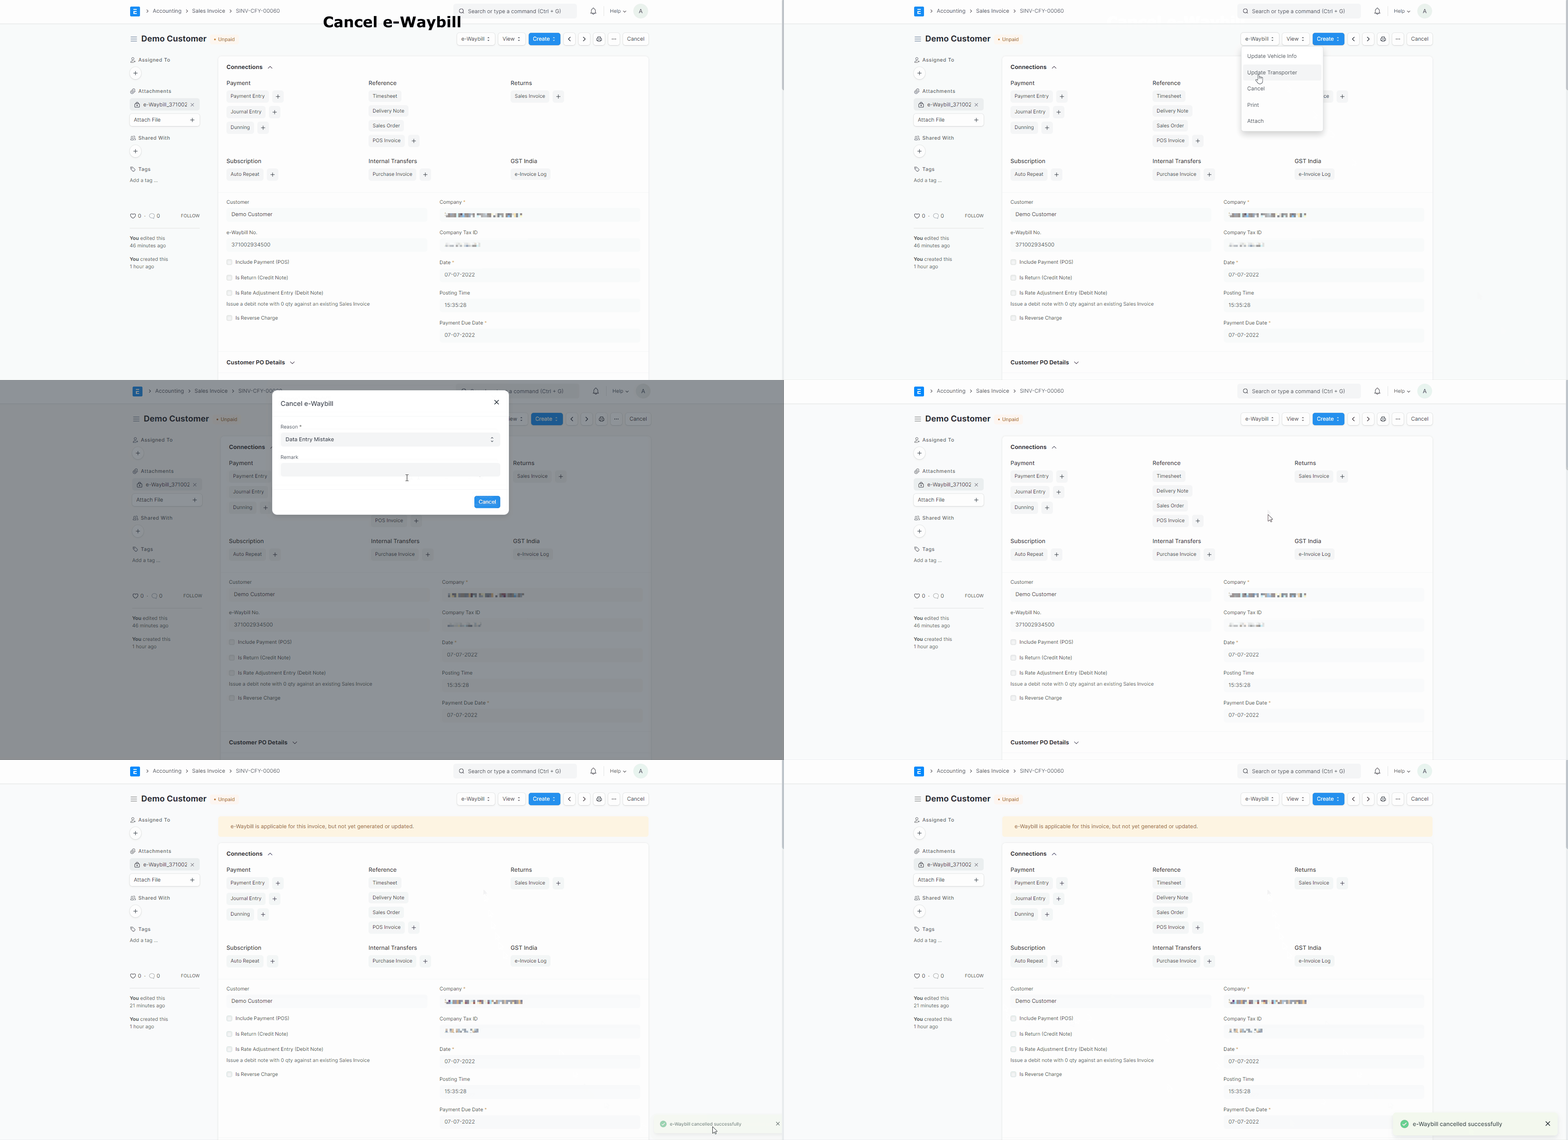
If within validity, you shall be allowed to cancel the e-Waybill.
From the e-Waybill menu. Specify the reason for cancelling in the dialog and click cancel to cancel the e-Waybill.
While you cancel the e-Waybill, the attachment of the old e-Waybill, shall be removed.
e-Waybill Logs #
In this DocType, e-Waybill history is maintained. It is created after you generate an e-Waybill using the APIs. Any further updates to e-Waybill are added here as a comment.
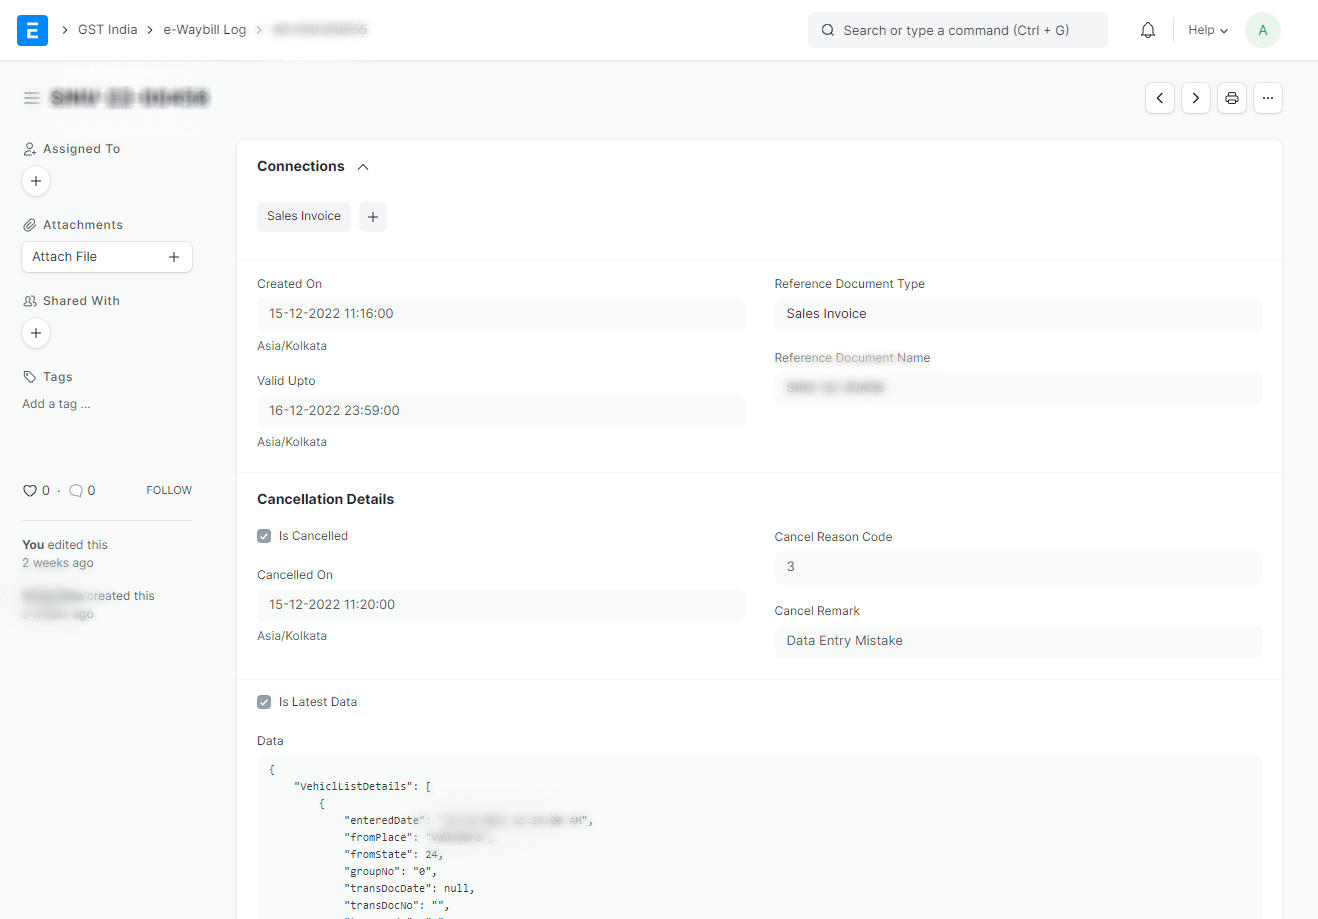
Updated Log

Bulk e-Waybill Generation #
Steps to generate the e-Waybill using the bulk generation facility:
- Submit the relevant document (say Sales Invoice).
- If e-Waybill is applicable for the current document, you shall see the e-Waybill menu --> Select Generate.
- Generate e-Waybill dialog box shall appear.
- Update the transport fields and Download JSON.
- Login to your e-Waybill Account --> Select Generate Bulk e-Waybill --> Choose the JSON file and upload it --> Click Generate.
- e-Waybill shall be generated --> Update the e-Waybill number in your Sales Invoice / Delivery Note.
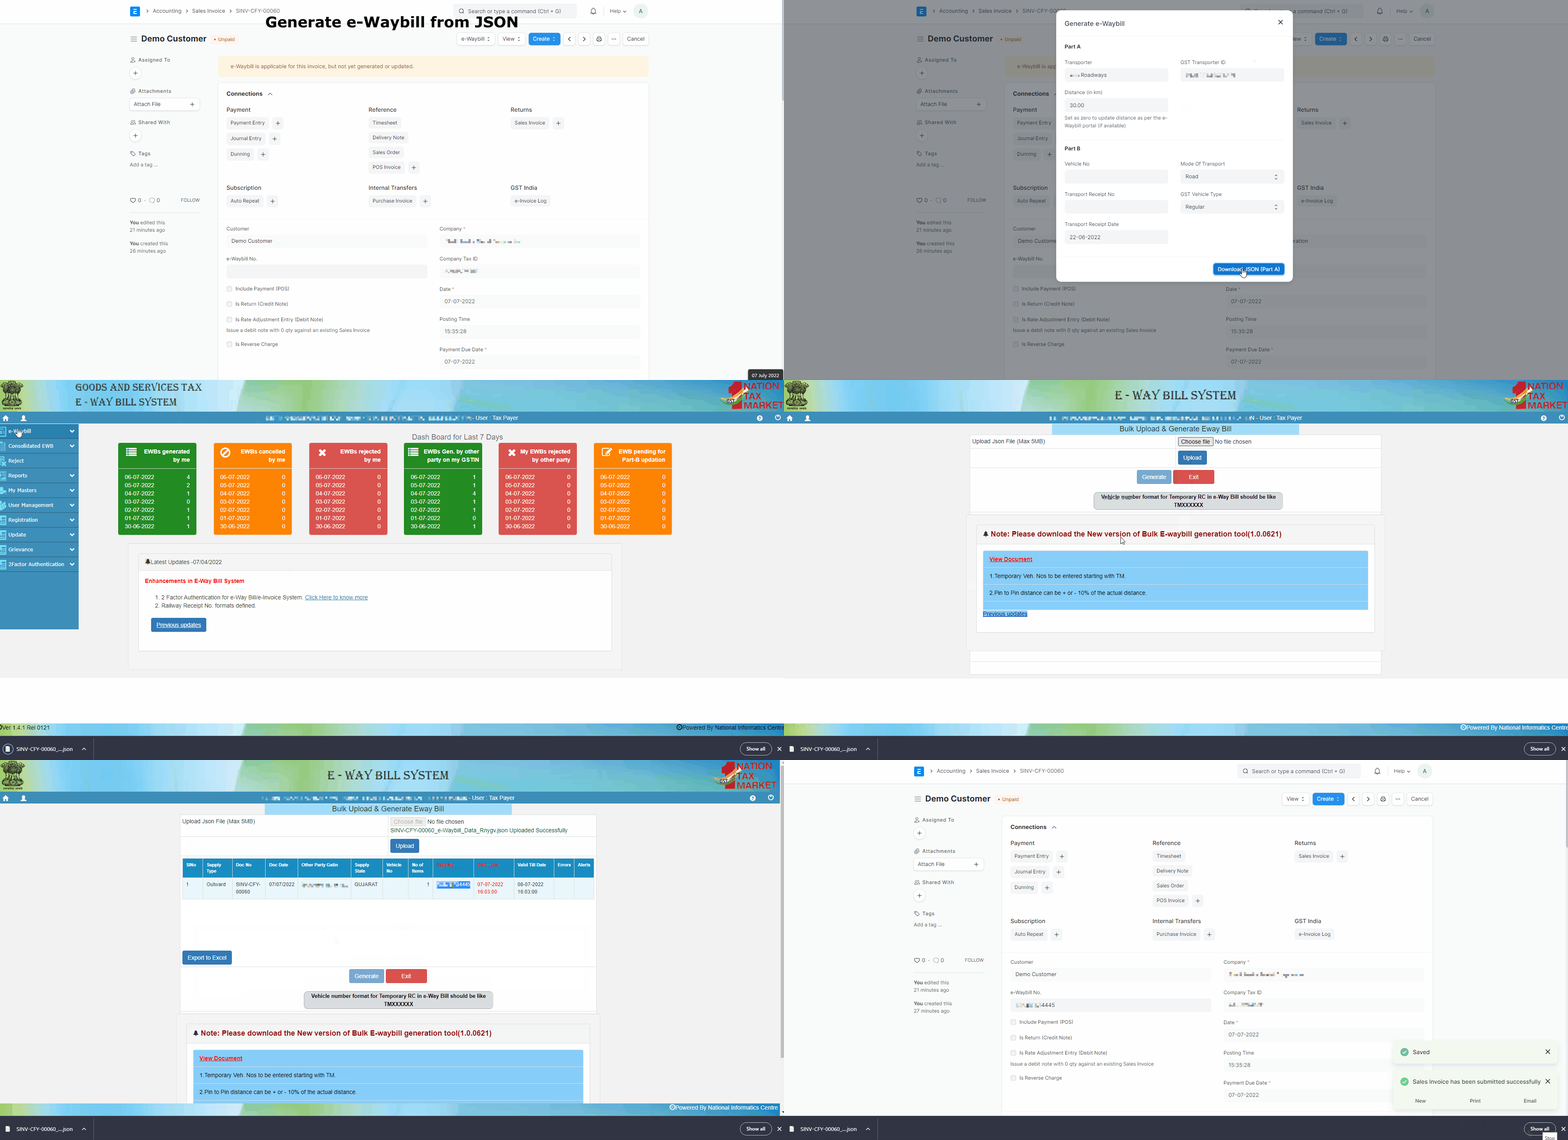
e-Waybill JSON Genration #
Steps to generate e-Waybill JSON for more than one document (Only for Sales Invoices)
- Select the Invoices from the Sales Invoice List for which you want to generate an e-Waybill JSON.
- Click Actions --> download e-Waybill JSON.
- Upload to e-Waybill portal and generate e-Waybill.
WARNING
You shall not be able to update transport fields while you download e-Waybill JSON from the Sales Invoice List.